Pleurx Catheter Drainage Instructions: A Comprehensive Guide
Today’s date is 01/09/2026 14:31:23 (). This guide details crucial steps for safe and effective Pleurx catheter drainage, referencing resources like Mariam Troia’s blog and Carefusion documentation.
Proper technique, as illustrated in images from yumpu.com and manualsLib, minimizes complications and ensures optimal fluid removal for improved patient comfort and well-being.
Understanding the Pleurx System
The Pleurx system represents a significant advancement in managing recurrent pleural effusions – fluid accumulation around the lungs. It’s a closed-system drainage kit designed for intermittent drainage of fluid, offering patients greater independence and a potentially improved quality of life compared to frequent thoracenteses.
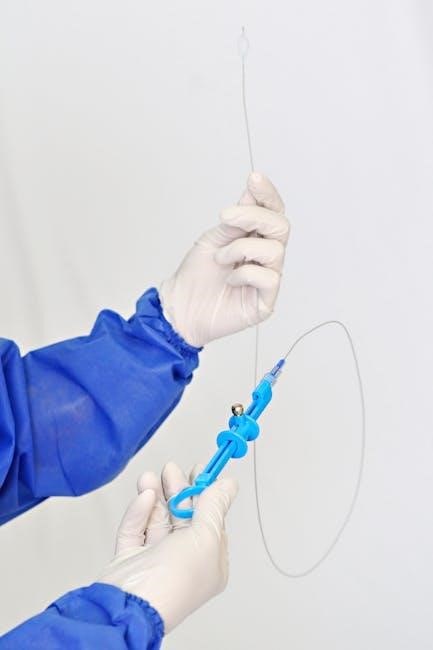
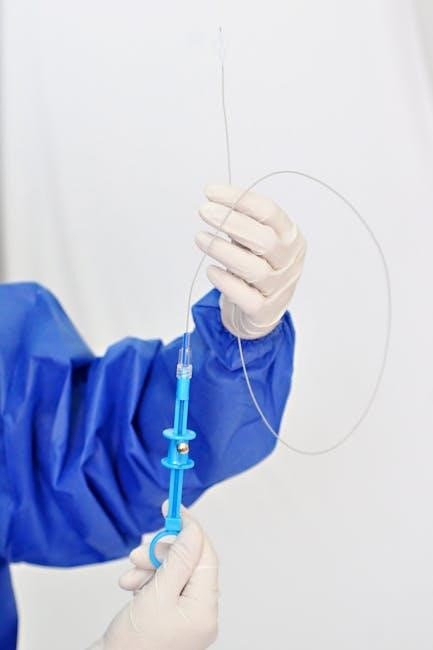
Essentially, the system comprises a catheter tunneled under the skin into the pleural space, connected to a drainage bottle. This allows patients, or their caregivers, to drain fluid at home, reducing the need for hospital visits. Images from resources like yumpu.com showcase the kit’s components, including the catheter itself, drainage bottles, and connection tubing.
Unlike continuous drainage systems, Pleurx is intended for intermittent use, typically when the patient experiences symptoms related to fluid buildup, such as shortness of breath. Understanding this distinction is crucial. The system, as detailed in Carefusion documentation, prioritizes patient comfort and control while effectively managing pleural effusions. Proper training and adherence to instructions are paramount for safe and successful utilization.
What is a Pleurx Catheter?

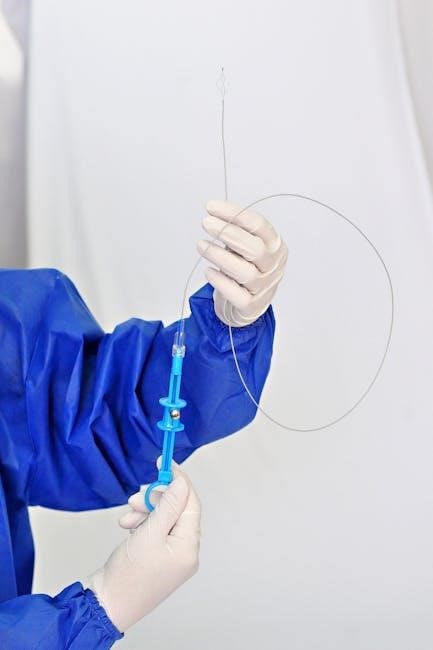
A Pleurx catheter is a thin, flexible tube specifically designed for the intermittent drainage of pleural fluid. Unlike chest tubes used for continuous drainage, the Pleurx catheter remains in place for an extended period, allowing patients to manage fluid buildup as needed, typically at home. Resources like those found on yumpu.com visually demonstrate the catheter’s construction and components.
The catheter is inserted via a small incision, then tunneled under the skin to reach the pleural space – the area between the lung and the chest wall. This tunneling helps secure the catheter and reduce the risk of infection. It features side holes to facilitate fluid drainage when connected to a dedicated drainage bottle.
Carefusion’s documentation highlights that the Pleurx catheter is made from biocompatible materials to minimize irritation. It’s crucial to understand that this is not a permanent implant, but a long-term solution requiring regular monitoring and maintenance, as outlined in usage instructions. Proper catheter care, as detailed in various online guides, is essential for preventing complications.
Indications for Pleurx Catheter Placement
A Pleurx catheter is typically considered for individuals experiencing recurrent pleural effusions – a buildup of fluid around the lungs – that significantly impact their quality of life. This is often due to conditions like congestive heart failure, cancer, or liver disease. Repeated thoracentesis (fluid removal with a needle) can be painful and carry risks, making a Pleurx catheter a preferable long-term solution for many.
Patients who find frequent trips to the hospital for fluid drainage burdensome are also strong candidates. The catheter allows for convenient, at-home drainage, improving independence and reducing healthcare costs. Documentation from Carefusion emphasizes its use in managing symptomatic effusions that don’t respond adequately to other treatments.

However, it’s not suitable for all effusions. Factors like lung entrapment or loculated fluid (fluid trapped in pockets) may preclude catheter placement. A thorough evaluation by a healthcare professional is crucial to determine if a Pleurx catheter is the appropriate intervention, considering the patient’s overall health and the nature of their effusion.

Preparing for Pleurx Catheter Drainage
Prior to initiating Pleurx catheter drainage, meticulous preparation is essential for a safe and effective procedure. Begin by reviewing your healthcare provider’s specific instructions, as protocols can vary. Ensure you understand the entire process and have a designated, clean, and well-lit space for drainage.
Gather all necessary supplies (detailed in a later section) and organize them within easy reach. A comfortable chair with armrests is recommended to support positioning during the drainage process. It’s vital to inform a family member or caregiver about your drainage schedule, especially during initial sessions, for assistance if needed.
Empty your bladder before starting, as this can help minimize discomfort. Review the catheter site for any signs of infection – redness, swelling, or increased pain – and report any concerns to your healthcare provider immediately. Mental preparation is also key; understanding the process can reduce anxiety and promote a smoother experience.
Gathering Supplies
Successful Pleurx catheter drainage relies on having all necessary supplies readily available. This includes the Pleurx drainage kit itself, typically containing the catheter, drainage tubing, and collection bag. Sterile gloves are paramount to maintain a sterile field and prevent infection.

Antiseptic solution, such as chlorhexidine or povidone-iodine, is crucial for cleaning the catheter site before and after drainage. Sterile gauze pads and tape are needed for securing the catheter and dressing the insertion site. A clean towel or underpad will protect the surrounding surface from spills.
Additional items include skin protectant to safeguard the skin around the catheter insertion point, and appropriate personal protective equipment (PPE) like a gown and mask. A sharps container is essential for safe disposal of used catheters and needles. Finally, have a measuring container available to accurately document the volume of fluid drained.
Setting Up the Drainage System
Proper setup of the Pleurx drainage system is vital for a safe and effective procedure. Begin by carefully inspecting the drainage kit for any damage or defects. Ensure the collection bag is intact and the tubing is free from kinks or obstructions. Connect the drainage tubing securely to the Pleurx catheter, following the manufacturer’s instructions – often a simple twist-and-lock mechanism.
Position the collection bag below the level of the patient’s chest to utilize gravity for optimal drainage. Secure the bag to the bed frame or IV pole to prevent accidental dislodgement or spills; Prime the tubing with sterile saline, if indicated by the kit instructions, to remove any air bubbles that could interfere with accurate fluid measurement.
Before connecting to the patient, double-check all connections for tightness and ensure the flow valve on the collection bag is in the closed position. A properly assembled and primed system ensures efficient fluid removal and minimizes the risk of contamination;
Performing the Drainage Procedure
With the drainage system correctly set up, initiate the drainage process. Gently open the flow valve on the collection bag, allowing fluid to begin draining from the pleural space. Monitor the drainage rate closely; a consistent, steady flow is ideal. Avoid excessive negative pressure, which could cause discomfort or damage to the lung tissue.
Throughout the procedure, maintain strict sterile technique. Do not disconnect the tubing unless absolutely necessary, and if disconnection occurs, immediately re-establish a sterile connection. Encourage the patient to relax and breathe deeply, as this can aid in fluid removal. Periodically assess the patient for any signs of distress, such as shortness of breath, chest pain, or dizziness.
Document the start time, fluid characteristics (color, clarity), and any patient complaints. Continue drainage until the flow slows to a minimal rate or the desired volume is reached, as determined by the healthcare provider.
Monitoring During Drainage
Vigilant monitoring is paramount during the Pleurx catheter drainage procedure. Continuously observe the patient’s vital signs – including heart rate, blood pressure, respiratory rate, and oxygen saturation – for any deviations from baseline. Closely watch for signs of respiratory distress, such as increased shortness of breath, wheezing, or cyanosis.
Regularly assess the drainage site for leakage, redness, swelling, or pain. Document the volume and characteristics of the drained fluid (color, clarity, presence of blood or debris) at regular intervals. Pay attention to the patient’s comfort level, asking about any pain or discomfort they may be experiencing.
Be alert for potential complications like hypotension or arrhythmias. Maintain open communication with the patient, encouraging them to report any unusual sensations immediately. Accurate and consistent documentation of all observations is crucial for effective patient care.
Post-Drainage Care: Catheter Site
Meticulous catheter site care is essential following Pleurx drainage to prevent infection and promote healing. Immediately after drainage, apply a sterile dressing to the insertion site, securing it firmly. Regularly assess the site for signs of infection – redness, swelling, warmth, pain, or purulent drainage.
Reinforce the importance of keeping the site clean and dry to the patient. Provide clear instructions on proper hand hygiene before and after touching the catheter or dressing. Advise against applying any lotions, creams, or powders to the site unless specifically directed by a healthcare professional.
Monitor for signs of leakage around the catheter and reinforce the dressing if necessary. Educate the patient on the importance of avoiding strenuous activity that could dislodge the catheter. Document all site assessments and interventions in the patient’s medical record.
Catheter Site Cleaning Protocol
A standardized cleaning protocol is vital for maintaining Pleurx catheter site integrity. Begin by gathering supplies: sterile gloves, chlorhexidine or povidone-iodine solution, sterile gauze pads, and sterile saline. Perform thorough hand hygiene and don sterile gloves.
Gently cleanse the skin around the catheter insertion site with the chosen antiseptic solution, using a circular motion, starting from the insertion point and moving outwards. Avoid vigorous scrubbing, which can irritate the skin. Follow with a sterile saline-soaked gauze pad to remove any remaining antiseptic residue.
Allow the site to air dry completely before applying a new, sterile dressing. Ensure the dressing completely covers the catheter insertion site and is securely fastened. Document the date, time, and solution used for cleaning, as well as any observed site characteristics. Repeat this protocol as prescribed by the healthcare provider, typically daily or with each dressing change.
Recognizing and Managing Complications
Prompt recognition of complications is crucial when managing a Pleurx catheter. Potential issues include infection, catheter occlusion, bleeding, and pneumothorax. Signs of infection – redness, swelling, warmth, pain, or purulent drainage at the catheter site – require immediate medical attention.
Catheter occlusion can manifest as difficulty draining fluid; gentle flushing with sterile saline, as directed by a healthcare professional, may resolve this. Bleeding is usually minor and can be controlled with direct pressure. However, significant bleeding warrants immediate medical evaluation.
A pneumothorax, though rare, presents with sudden shortness of breath and chest pain. If suspected, seek emergency medical care. Regularly monitor the drainage amount and characteristics, and report any significant changes to your healthcare provider. Early intervention can prevent minor complications from escalating into serious problems, ensuring patient safety and optimal catheter function.
Signs of Infection
Recognizing infection early is paramount when managing a Pleurx catheter. Several indicators suggest a potential infection requiring immediate medical attention. Local signs at the catheter exit site include increasing redness, swelling, and warmth to the touch. Any tenderness or pain around the site that wasn’t present previously is also concerning.
Purulent drainage – thick, cloudy, or discolored fluid – is a strong indicator of infection. A foul odor emanating from the catheter site is another red flag. Systemic signs, such as fever (temperature of 100.4°F or higher), chills, and generalized malaise, may accompany a localized infection.
If you experience any of these symptoms, do not attempt to manage the infection yourself. Contact your healthcare provider immediately. Prompt diagnosis and treatment with antibiotics are essential to prevent the infection from spreading and causing more serious complications. Maintaining strict aseptic technique during catheter care is vital for prevention.
Troubleshooting Common Issues
Occasional difficulties can arise during Pleurx catheter drainage. If flow stops unexpectedly, first check for kinks or obstructions in the tubing. Gently reposition the patient and ensure the drainage bottle is below the catheter insertion site to utilize gravity. Avoid forceful flushing, as this could damage the catheter.
Leakage around the catheter site can occur. Ensure the dressing is secure and properly applied. If leakage persists, contact your healthcare provider; a different dressing or catheter repositioning may be necessary. Difficulty accessing the catheter hub can be addressed by ensuring adequate lighting and using sterile gloves.
If you encounter resistance while attempting drainage, do not force it. Stop the procedure and consult your healthcare provider. Document any issues encountered during drainage, including the steps taken to resolve them. Maintaining a log helps identify recurring problems and optimize future procedures.
Fluid Volume Monitoring and Documentation
Accurate fluid volume monitoring is critical during Pleurx catheter drainage. Meticulously record the amount of fluid removed with each drainage session, noting the date and time. Use the graduated markings on the drainage bottle to ensure precise measurements. Document the fluid’s characteristics – color, clarity, and any presence of blood or sediment – as these observations can provide valuable clinical information.
Track the total cumulative fluid removed since catheter placement. This data helps assess the effectiveness of the drainage and guides adjustments to the treatment plan. Report any significant changes in fluid volume or characteristics to your healthcare provider promptly;
Maintain a detailed drainage log, including any complications encountered during the procedure. This comprehensive documentation is essential for ongoing management and allows healthcare professionals to evaluate the patient’s response to therapy effectively. Regular review of the drainage log aids in identifying trends and optimizing patient care.
Dietary Recommendations Post-Drainage
Following Pleurx catheter drainage, maintaining adequate nutrition is vital for recovery and preventing complications. Focus on a balanced diet rich in protein to support tissue healing and immune function. Ensure sufficient fluid intake – typically 8-10 glasses of water daily – to replenish fluids lost during drainage and maintain hydration. However, discuss fluid restrictions with your healthcare provider if you have underlying heart or kidney conditions.
Consume foods high in electrolytes, such as potassium and magnesium, which may be depleted during fluid shifts. Good sources include bananas, oranges, leafy green vegetables, and yogurt. Avoid excessive sodium intake, as it can contribute to fluid retention.
Small, frequent meals are often better tolerated than large meals, especially if you experience shortness of breath. Listen to your body’s cues and adjust your diet accordingly. Consult with a registered dietitian for personalized dietary recommendations tailored to your specific needs and medical history.
Activity Restrictions After Drainage
Following Pleurx catheter drainage, a period of restricted activity is crucial for allowing the lung to re-expand and preventing complications. Avoid strenuous activities, heavy lifting (over 5-10 pounds), and vigorous exercise for at least 24-48 hours, or as directed by your healthcare provider. Gradually increase your activity level over the following days, paying close attention to your body’s signals.

Mild activities like walking short distances are generally encouraged to promote circulation and prevent blood clots. Avoid activities that cause shortness of breath, chest pain, or discomfort around the catheter insertion site. Refrain from driving until you feel fully recovered and are no longer taking pain medication that may impair your judgment.
Listen to your body and rest when needed. Discuss any concerns or limitations with your healthcare team before resuming your normal activities. Proper rest and a gradual return to activity are key to a successful recovery after Pleurx drainage.
Catheter Maintenance and Replacement
Regular catheter maintenance is vital to prevent infection and ensure optimal function. Follow your healthcare provider’s specific instructions regarding cleaning and care. Typically, this involves cleaning the insertion site with antiseptic solution as directed, usually daily or after each drainage. Avoid harsh soaps or lotions near the catheter site.
Monitor the site for signs of infection (redness, swelling, drainage, pain) and report any concerns immediately. The catheter dressing should be kept clean, dry, and intact. Do not attempt to manipulate or adjust the catheter yourself.
Catheters are not permanent and will eventually require replacement. The frequency of replacement varies depending on individual factors and catheter type, but is generally every few months. Your healthcare provider will schedule replacement procedures based on your needs. Never attempt to remove the catheter yourself; it must be done by a trained medical professional.
When to Contact Your Healthcare Provider
Prompt communication with your healthcare provider is crucial for managing your Pleurx catheter effectively. Immediately contact them if you experience any signs of infection at the catheter site, including increased redness, swelling, pain, or purulent drainage. Fever above 100.4°F (38°C) also warrants immediate attention.
Report any difficulty with drainage, such as a sudden decrease in fluid output or complete blockage. Chest pain, shortness of breath, or a new cough should be reported immediately, as these could indicate complications like pneumothorax. Bleeding from the catheter site that doesn’t stop with gentle pressure requires medical evaluation.
Don’t hesitate to reach out with any concerns, even if they seem minor. Schedule a follow-up appointment as directed to monitor your condition and catheter function. Always have your catheter information available when contacting your healthcare team, including the date of insertion and any recent drainage amounts.
Long-Term Management with a Pleurx Catheter
Successful long-term management with a Pleurx catheter relies on consistent adherence to established protocols. Regular catheter site care, including cleaning as outlined in your instructions, is paramount to prevent infection. Maintain meticulous documentation of all drainage volumes and dates, sharing this information with your healthcare provider during follow-up appointments.
Continue to monitor for any signs of complications, even months after initial insertion. Understand your fluid restriction and dietary recommendations, as these contribute to managing fluid buildup. Adhere to activity restrictions as advised by your physician, gradually increasing activity levels as tolerated.
Be proactive in scheduling routine catheter flushes (if prescribed) to maintain patency. Discuss catheter replacement options with your doctor when appropriate, considering the catheter’s lifespan and your evolving needs. Utilize available resources and support groups to connect with others and enhance your understanding of long-term Pleurx catheter management.
Resources and Support Groups
Navigating life with a Pleurx catheter can be easier with access to reliable information and supportive communities. Carefusion, the manufacturer, provides detailed product information and potentially training materials – explore their official website for resources. Your healthcare provider remains your primary source of guidance, offering personalized advice and addressing specific concerns.
Online forums and support groups connect individuals sharing similar experiences. These platforms offer a space to exchange tips, discuss challenges, and find emotional support. Consider searching for disease-specific organizations related to the underlying condition necessitating the Pleurx catheter (e.g., heart failure, cancer) as they often have relevant resources.
Local hospitals and clinics may host educational workshops or support groups for patients managing chronic conditions. Don’t hesitate to ask your healthcare team about available local resources. Websites like Yumpu, while containing product manuals, can also lead to further information and potentially connect you with relevant communities. Remember to critically evaluate information found online and always consult with your doctor.
No Responses